

How to Create a Balanced Pampas Grass Arrangement with Different Stem Heights
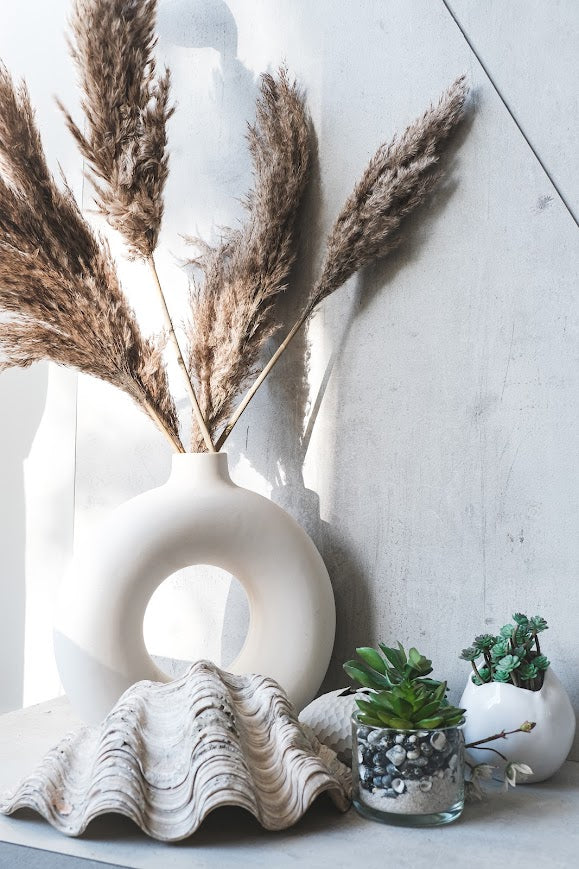
pampas grass stems of different lengths. Doing this adds both dimension and fullness to your pampas grass arrangement like you can see here.

Why Stem Height Matters in Pampas Grass Arrangements
When plumes sit at different heights, each one has more room to spread out in the vase. The pampas arrangement here also gains depth, making it look more natural from a variety of different angles. If every stem is at the same length, they will bunch together oddly along the top. Thus, varying stem heights breaks up that line and gives your arrangement more dimension and shape.
Choosing the Right Number of Stems for Your Vase
The number of stems for each vase largely depends on the opening width of your vase, plume size and how full you want your arrangement to look. However, as a rough guide, here are some starting points I personally use for arrangements.
-
Small, tabletop vases (20 to 30cm height): 3 to 5 stems
-
Medium vases (30 to 50cm height): 6 to 9 stems
-
Large, floor vases (50cm and above): 10 to 15 stems
How to Arrange Tall, Medium and Short Pampas Stems

Every time you buy a pampas bunch, split your stems into three groups:
-
Tall Stems: Place these stems in the back or the middle of your arrangement to add height.
-
Medium Stems: Most of the time, medium stems act as fillers to occupy the space between tall and shorter stems.
-
Short Stems: I highly recommend placing shorter stems in the front or on the edges of the bunch to give the arrangement a layered look.
P.S. Don’t worry about getting your heights exactly right. You always have the chance to mix up stems, take a step back and see how they look when placed together. Just make sure to move them around enough to ensure the plumes have enough space to settle in the vase without making it look too crowded.
Creating Different Arrangement Shapes
Fan-Shaped Arrangements

-
Place the tallest stems in the centre.
-
Angle the other stems outwards on both sides.
-
Use shorter stems on the fringes to create a fan shape.
Note: These arrangements work best for statement pieces placed against a wall or in a corner.
Rounded and Full Arrangements

-
Place the taller stems near the centre.
-
Add medium stems around them.
-
Use shorter stems towards the front and sides to create a rounded outline.
P.S. Don’t worry about the sides having to match exactly. A little unevenness makes the arrangement look even more relaxed.
Minimalist Asymmetrical Arrangements

-
Group most of the stems in a way that they lean towards one side dominantly.
-
Add one or two shorter stems on the opposite side.
-
Adjust until the arrangement looks balanced. Make sure that they should look intentional and not lopsided.
Choosing Vase Shapes for Different Stem Heights
The vase plays a major role in how your arrangement looks and feels. Here are the three most common type of vases and how you can match them according to your bunch.
Narrow-Neck Vases

This vase has a tiny opening that keeps stems close and standing almost upright. Opt for this type if your arrangement has fewer stems.
Wide-Mouthed Vases

These vases provide more room for stems to spread out. They are particularly suitable for fan-shaped and rounded arrangements.
Cylindrical Vases

These vases allow you to move stems around without a narrow neck getting in the way. They also require more stems than narrow-neck vases but they are more relaxed in arrangement by comparison.
Note: It’s also important for you to check the vase height when arranging your bunches in vases. A taller arrangement will need a sturdy and weighty base to keep it from tipping over. If the plumes look too heavy for the vase, try to reduce the number of stems or opt for a taller vase.
Common Arrangement Mistakes and How to Fix Them
-
All the stems are of the same height - Always opt for a mix of tall, medium and short stems to break up the top line of arrangement and add visual interest.
-
The plumes look crowded in the vase - Either remove a few stems or opt for a vase with a wider opening.
-
All the plumes face the same way - This is a highly likely possibility in asymmetrical arrangements. Turn some stems slightly to other sides to make the plumes sit at different angles.
-
The arrangement looks top-heavy - If the bunch overshadows the vase, the arrangement could look overwhelming. In these cases, swap for a taller, sturdier vase or reduce the number of tall stems.
-
The arrangement looks flat from the side - Once done arranging, walk and look at your arrangement from different angles. In case one side looks flat, angle one or two stems forward in that direction and repeat until it looks good from all angles.
Explore Dried Pampas Grass at Coastal Habitat

At Coastal Habitat, we sell dried pampas grass in various lengths and colors so you can pick one that fits your vase and home. I’d suggest you explore our entire collection here to mix and match stems for your own arrangement. However, if you want a ready-made setup with bunches and vases that are matched to look good together, check out our collection here. All our orders are shipped across India and the globe in sturdy, eco-friendly packaging.
Final Thoughts
To summarize, measure the height of your vase and the space where you wish to place the arrangement before buying anything. Go for fluffier plumes when you want the arrangement to look larger than life and opt for slimmer stems in shorter arrangements. Always ensure to have a healthy mix of tall, medium and short stems in your arrangement. In case you don't want to make one yourself, check out our ready-made collection here. You can also use it as inspiration to DIY your own bunch if you want. Happy arranging!
